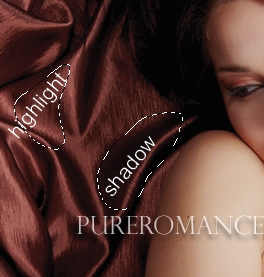
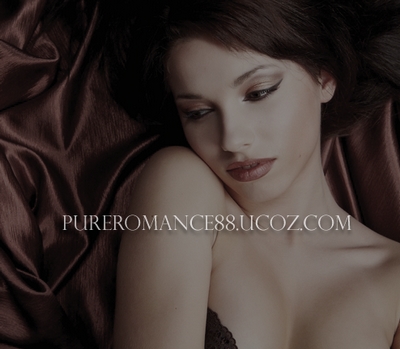
1. Open your model stock. As you see, the background of this photo has
highlight and shadow so it will get better and natural at the end.
You should retouch skin ( soften, remove blemishes...) before apply this effect. If you dont know how to retouch, just follow my retouch tutorial or find many good tutorials over the web.
As i use model with a pretty perfect skin so i skip this step.
Create a new Brightness/Contrast layer: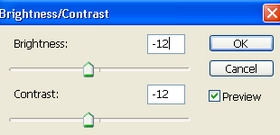
The stock i use has high contrast on model face so i must
reduce it.
2. Create a new Hue/Saturation layer, desaturate the picture. It depends on how saturated your photo is. For my own, i use this parameter:


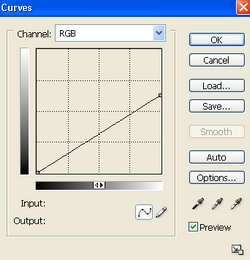
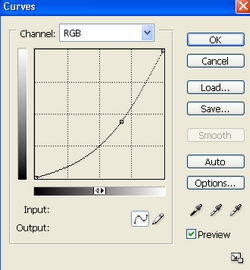
3. In this step i use Curves to reduce the light on whole picture:
4. Create a new Photo Filter layer to add warm tone for picture:
You can increase or decrease this value depending on your own photo.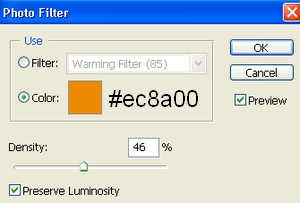
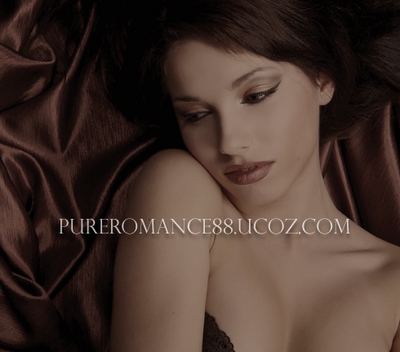
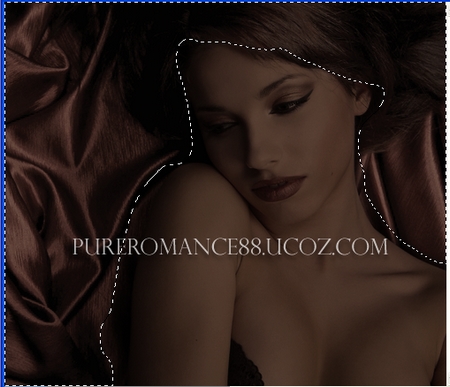
5. In this step we will use Curves again to get chocolate skin:
Then use soft black brush to eraser background:
6. Create a new layer, use soft brush, color #f3d6ad to paint on eyelids , then set this layer to Soft light 20%:
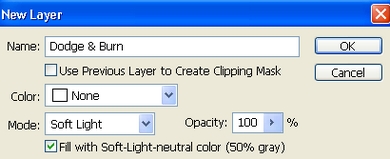
7. Create a new layer with Soft light mode:
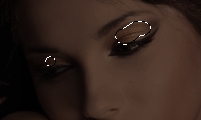
 Use Dodge tool to make highlight on eyelids, lips, cheek, neck, arm center, and Burn tool to darken arm sides, forehead, breast:
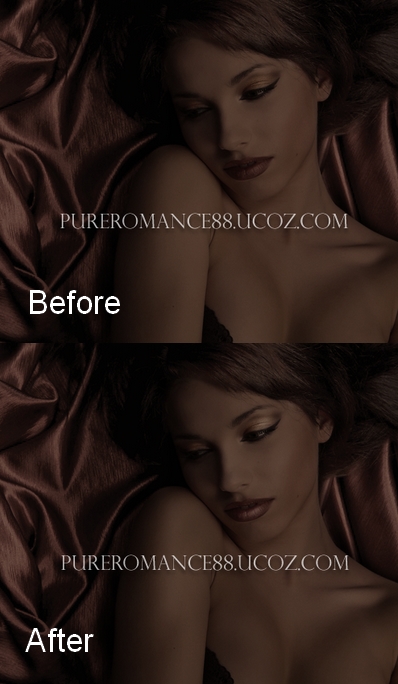
Depending on your picture you can use Dodge and Burn for approriate parts.
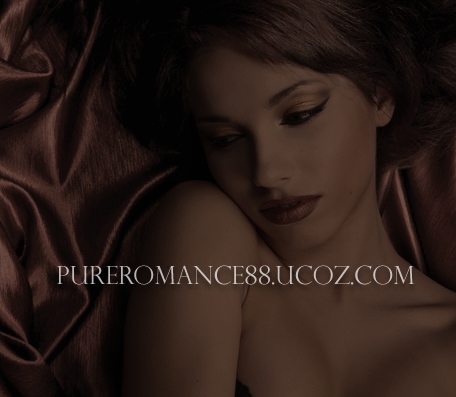
8. Last step: new Brightness/Contrast layer again to increase highlight then use soft black brush to keep the dark parts as shown below:
highlight and shadow so it will get better and natural at the end.
You should retouch skin ( soften, remove blemishes...) before apply this effect. If you dont know how to retouch, just follow my retouch tutorial or find many good tutorials over the web.
As i use model with a pretty perfect skin so i skip this step.
Create a new Brightness/Contrast layer:
The stock i use has high contrast on model face so i must
reduce it.
2. Create a new Hue/Saturation layer, desaturate the picture. It depends on how saturated your photo is. For my own, i use this parameter:
3. In this step i use Curves to reduce the light on whole picture:
4. Create a new Photo Filter layer to add warm tone for picture:
You can increase or decrease this value depending on your own photo.
5. In this step we will use Curves again to get chocolate skin:
Then use soft black brush to eraser background:
6. Create a new layer, use soft brush, color #f3d6ad to paint on eyelids , then set this layer to Soft light 20%:
7. Create a new layer with Soft light mode:
Use Dodge tool to make highlight on eyelids, lips, cheek, neck, arm center, and Burn tool to darken arm sides, forehead, breast: Depending on your picture you can use Dodge and Burn for approriate parts.
8. Last step: new Brightness/Contrast layer again to increase highlight then use soft black brush to keep the dark parts as shown below:
No comments:
Post a Comment